Unfortunately, even the most reliable pumping equipment can fail. Among the violations in the work there are serious breakdowns and commonplace wear of rubbing parts or seals. Correction of the simplest problems can be done by a home master, but you must admit that even elementary repair operations need to know how to carry out correctly.
We are happy to assist you in mastering the difficult work of a household appliance repairman. In the article brought to your attention all the characteristic types of breakdowns of pumping units are described in detail. Effective methods of eliminating malfunctions in the operation of water supply systems are presented.
Those wishing to repair the pump station with their own hands will find answers to all the questions that arise in such cases. Useful information is supported by step-by-step photo instructions, diagrams and videos.
Device and operation features
With the help of a pumping station, several problems related to water supply can be solved:
- organize the automatic flow of water from the source to the water supply system of the house;
- adjust the pressure of the water in the water supply, bringing it to an acceptable level;
- protect the water system from water hammer;
- create some water supply in case of problems with water supply.
You can purchase the pumping station in a ready-made form, which will slightly facilitate its installation, or assemble it yourself, picking up individual elements depending on your own situation.
For example, if a deep well is used as the water source, it makes sense to replace the surface pump with a suitable submersible model.

This diagram illustrates the structure of a conventional pumping station: a hydraulic accumulator connected to a surface pump and a pressure switch
Understanding the principles of the pumping station will help to understand the features of the repair of this device. Its important part - a hydraulic tank - a container with a built-in rubber insert. Using a pump, water enters the membrane part of this tank. There is air on the other side of the membrane (sometimes pure nitrogen is supplied to the hydraulic tanks, but this is rare).
This combination creates a certain pressure inside the tank. On one side of the tank is a conventional automobile nipple through which you can bleed off excess air or pump in the missing.
On the other hand, a pipe is installed. The other elements of the pumping station and system are connected to it through a special fitting for five outputs: pressure gauge, pressure switch, pump hose, water pipe, etc.
The hydraulic tank is connected to the water supply at home. When the water is opened, the tank is emptied and the pressure inside the tank decreases. When it reaches the set value, the pump automatically turns on, and the water enters the accumulator until it is full and the pressure reaches the set maximum level.

This detailed diagram allows you to understand the device and the principle of operation of the hydraulic tank. The air pressure in the tank should be maintained at about 1.5 atm to prevent damage to the membrane (+)
The pump is controlled by the pressure switch. This is a small device connected to both the accumulator and the pump. Both the condition of the water supply system and the operation of the pump, the presence of such a station is extremely favorable.
The hydraulic tank serves as a buffer that protects the water supply from sudden water hammer. The pressure switch reduces the number of pump starts and stops to the required minimum, which extends the life of the equipment.
Although a small amount of water is inside the tank constantly, you should not consider it as the main place to store a large supply of water. The larger the volume of the tank, the higher its price.
If you need to stock up with a solid volume of water, it is better to supplement the system with an inexpensive plastic container of a suitable volume. And with protection against hydroblows and a small hydraulic tank it will cope quite satisfactorily.
In addition, it is important to correctly select the pumping station, focusing on the characteristics of the water source and the location of the water points.
Parts replacement example
To begin with, let us examine an example of replacing the working rings and seals of the automatic pump. The unit worked in the format of a pumping station pumping water from a storage tank to consumers.
After several minutes of “dry running”, which occurred due to a breakdown of the submersible pump, the productivity decreased, the system turned off even when the cranes were open at the points of the draw-off.
Image Gallery
Photo from
Pump station as a booster
Jumbo Centrifugal Pump
Technical features of the pump
Purchase of replacement parts
Buying spare parts for automatic pumps manufactured in the CIS countries was not difficult. In Russian monetary units, about 900 rubles were spent.
Image Gallery
Photo from
Step 1: Separate the tank and remove the cover
Step 2: Separating the Guide
Step 3: Removing the impeller of the automatic pump
Step 4: Unscrew the central shaft
Step 5: Removing the mechanical seal from the shaft
Step 6: Removing the Spring Washer
Step 7: Disassembled Jumbo Pump
Step 8: Cleaning Parts and Preparing for Assembly
If, when examining the unassembled part of the pump, foci of rust are detected, they should be removed, everything that is available should be cleaned of dirt.
Image Gallery
Photo from
Step 9: Installing a new bottom and washer with spring compensator
Step 10: Installing a New Implement Impeller
Step 11: Installing the End Guide
Step 12: Assembled Pump with New Parts Installed
If the new parts of the automatic pump are not installed correctly, the unit will not work, you will have to redo it again. Therefore, it is better to immediately carefully memorize or mark the sequence of location and side of the installation.
Common problems and breakdowns
Since the pumping station consists of several nodes, the breakdown may be associated with one or more of them, for example:
- the pump is clogged with dirt;
- the pump motor is broken;
- lost pressure switch settings;
- the integrity of the rubber membrane in the tank is broken;
- there are cracks in the tank body, etc.
As a result, the pumping station either works unsatisfactorily or ceases to function at all. Sometimes it’s not the station at all, but the breakdown of, say, water pipes.
To determine the cause of the problems, you should consider how the most frequent breakdowns occur during the operation of the equipment. For example, figuring out why the equipment turns on but does not turn off, you need to take into account the features of the work and the settings of the pressure switch.
When troubleshooting a pumping station, you need to remember that almost all models of surface pumps are not recommended for dry running. Before turning on the pump to check its operation, make sure that it is filled with water. If this is not the case, the device must be filled through a special filling hole.

“Dry running”, i.e. running without water, idling, is very dangerous for almost all models of surface pumps. Parts wear out a lot, motor winding may burn out
# 1: Pump is running, water is not running
If the pump turns on and you can see (hear) that it is working, but the water does not enter the tank, you need to figure out where exactly this water goes. The first thing to check is the check valve. If it went bad, the water just spilled back. If there is water in the intake hose, it means that the non-return valve is not to blame for anything, you need to look for another reason.
If the hose is empty, remove it and inspect the check valve. It may happen that the pumping station does not pump water at all due to simple clogging of the valve openings. Rinse the device enough so that it starts working correctly again.
Sometimes it is necessary to replace the spring or the entire valve. Of course, after replacing a part or repair, you should check the operation of individual components of the pumping station, and only then perform the final assembly and commissioning of the device.

The non-return valve is necessary for the normal operation of the pumping station. If its holes are blocked, you just need to disassemble the device and rinse it
If there is water in the intake hose, check all joints and pipes between the pump and tank for leaks. Perhaps the water just flows out through a crack or hole. The damaged pipe must be replaced, and the leaky connection must be cleaned, sealed and resealed.

If the screw connections on the pumping station become leaking and leaking, they must be cleaned and resealed using suitable materials
There is a third reason why water does not go into the hydraulic tank: the low debit of the water source. This happens if for some reason the water does not enter the water intake part of the well or well.
This happens, for example, as a result of siltation or sanding. Or the pump for the source is not selected correctly, it pumps out the water too quickly, its supplies do not have time to recover.
How to choose, install and connect a pumping station for water intake is described in the article, which we recommend that you familiarize yourself with.
The pump will most likely have to be replaced; there are special models for low debit sources. To increase the debit of the well, it makes sense to pump it, i.e. wash accumulated dirt. For flushing the well, a separate pump should be used, and not the one with which the pump station was equipped.
As an urgent measure, it is sometimes advised to take water from a greater depth, but this recommendation should be used with caution. If the source is sandy, immersing the water intake or submersible pump too deeply can lead to contamination of the pumping equipment and serious damage to it.
Another possible reason the pump stopped pumping water is impeller wear. In this case, it will spin idle. You will have to remove the pump, disassemble it, rinse, replace the impeller, and possibly the pump housing. Sometimes it’s easier to install a new pump.
If the above “diagnoses” have not been confirmed, it makes sense to simply check the voltage in the electrical network. If it is too low, the pump will turn on, but it will not be able to supply water. It remains to establish normal power supply so that the pumping equipment functions again in the required mode.
# 2: The device turns on, but does not work
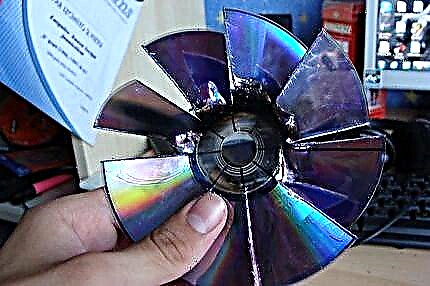
This happens with pumps that have not been used for a long time (for example, in winter). Since the clearance between the impeller and the casing is small, these elements, being stationary, can simply “stick” to each other.
When turned on, the pump will buzz normally, but the impeller will remain stationary. The device should be turned off immediately in such a situation.

The clearance between the impellers (impeller) of the pump should be small. If the wheels are worn out, the clearance will increase and the performance of the device will decrease, therefore it is better to replace the wheels with new ones.
To cope with this problem is not difficult, just simply twist the impeller with your hands a couple of times. If, after switching on, the pump resumes operation, it means that the obstacle is removed.
Of course, before starting operation, a pump that has not worked for a while will not hinder rinsing. Sometimes the impeller has nothing to do with it, the capacitor simply failed. Damaged item must be replaced.

A burnt capacitor is a common cause of pump station failures. It is not difficult to replace it with a new element with suitable characteristics.
# 3: The pump station runs jerkily
This behavior of the technique is most often typical for situations when there are problems with pressure inside the tank. First of all, you need to check the behavior of the pressure gauge. If the pump shuts off when water enters, as expected, but soon there is a sharp drop in internal pressure, problems should be sought inside.
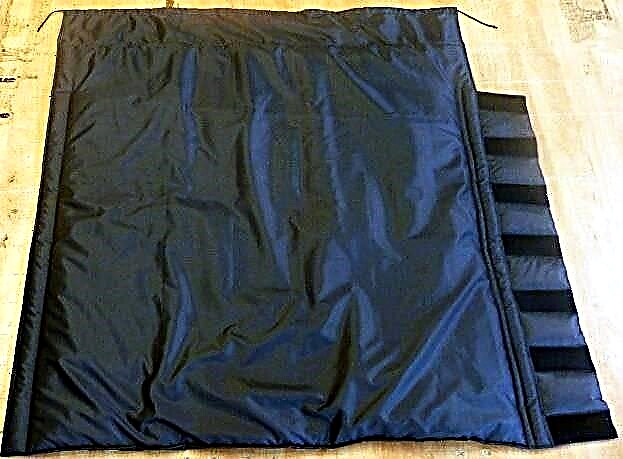
Most likely, the membrane in the accumulator broke. This is simple to make sure: if you open the nipple located on the “air” side of the container, water will flow from it, not air.
The tank should be removed, carefully disassembled, removed the damaged membrane and change it to a new one, exactly the same. Trying to somehow repair a damaged liner is usually useless, it will quickly deteriorate again.
The sequence of work on replacing the tank membrane is shown in the photo selection:
Image Gallery
Photo from
If, with a full accumulator, a malfunction of the system is observed, the water enters the breakdown points jerkily or does not enter at all, it is worth checking the condition of the membrane
To study the membrane, it is not necessary to immediately separate the pump from the hydraulic tank of the pumping station. Just unscrew the flange fasteners
After making sure that there are gaps and tears in the membrane, we unscrew the fixing screws that connect the pump to the accumulator
Through the hole in the assembled state under the flange, we remove the torn membrane from the tank
In any case, during the operation of the accumulator with a damaged membrane, sand will fall into the tank and rust will settle on the walls. Wash the tank and parts and thoroughly clean, dry
For replacement we purchase an elastic membrane, the volume of which corresponds to the volume of the hydropneumatic capacity. It is advisable that it be of the same production as the tank
In the cavity of the hydraulic tank, we install a membrane, after twisting it into a tube. We combine the outlet openings of the flange and the membrane, which itself will be repaired inside the tank
We fix the accumulator flange. Having completed the assembly, we pump air into the tank through a nipple located on the opposite side from the flange, using the automobile pump to the values indicated in the device passport
Pumping station in the water supply of a private house
Step 1: Examine the state of the membrane through the flange
Step 2: Preparing the accumulator for repair
Step 3: Removing the Pear-shaped Membrane from the Container
Step 4: Cleaning the Accumulator and Parts
Step 5: Acquisition of a new accumulator diaphragm
Step 6: Installing the membrane in the accumulator cavity
Step 7: Reassemble the Accumulator
There are other reasons for the pump station to work jerkyly. If the liner is not damaged, air will escape through the nipple. In this case, you need to check its pressure. If it is noticeably lower than the 1.5-1.8 atm recommended by the manufacturer, you just need to pump a certain amount of air with a suitable pump.
However, first it’s better to find out exactly where the air goes. It is likely that there is a crack in the tank housing caused by corrosion, mechanical damage, or similar causes.
It is necessary to close the place of air leakage or replace the hydraulic tank. Finally, make sure that the pressure switch is functioning without interruption. If this is not the case, the relay must be reconfigured or changed.
It happens that the pressure switch is simply clogged, especially if, for some reason, water with a lot of contaminants entered the station. Clogging of the relay is also observed when salts are deposited, if water has increased rigidity. The relay must be removed and inspected inlet. After flushing and removing contaminants, the appliance usually works correctly.

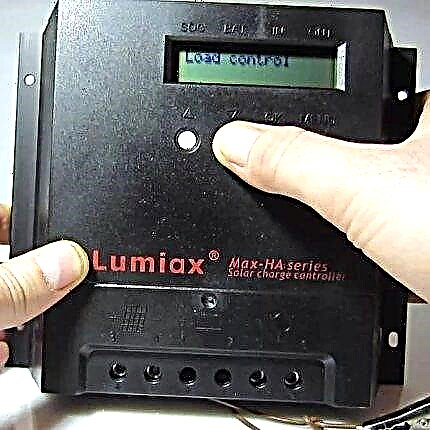
Near the adjustment springs, which are located under the cover of the pressure switch, there are signs “+” and “-“ indicating the direction of rotation of the spring when adjusting the device
If the relay needs to be replaced, it is worth considering the acquisition of a more modern model of this device. Such devices are regulated using arrows and screws, not springs, as in models of the type RDM-5. If you believe the reviews, setting up such a relay is much simpler, and the cost is quite reasonable.
# 4: Unit does not respond to shutdown
This picture is typical for situations when the settings of the pressure switch are lost, so the pump station does not pump water with the required pressure. Not always the cause of the breakdown of the pressure switch.
It happens that the wear of the impeller of the pump does not allow to provide the desired working pressure. In this case, you need to slightly tighten the large spring on the pressure switch to the side where “-” is indicated.

If the pressure gauge shows that the pressure in the pumping station is rapidly decreasing, most likely there are problems with the membrane. Or the pressure switch is faulty
As a result, the upper pressure settings will be slightly reduced, the pump will turn off. Relay adjustment should be done very carefully so as not to overwhelm the settings and not spoil the device. In addition, you need to think about repairing the pump in order to restore its working life, or about replacing it with a new device. Incorrect operation of one element can cause an imbalance of the entire system.
# 5: Water flows unevenly
It happens that the pump buzzes and works stably, but the water comes in uneven portions, that is, it is, then it is not. Most likely, not only water, but also air gets into the pipeline in some way.
It is necessary to check whether the water intake equipment is at the correct depth and whether the water level in the source has changed. By adjusting the position of the intake hose, the problem can usually be solved.
# 6: Pumping equipment does not turn on
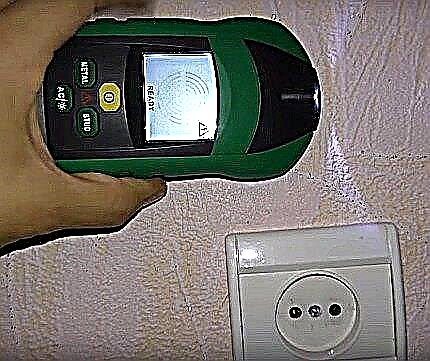
If the pump stops turning on, then either the device is broken or it is not receiving power. To begin with, it is worth checking the device with a tester and inspecting the contacts of the pressure switch. It often happens that they need cleaning. It is possible that after cleaning the contacts, the pump will turn on without problems.

Lack of power to the pump may be caused by contamination of the pressure switch contacts. Clean and reconnect both pairs of pins.
It is much worse if the pump is broken due to the burned motor winding. If this is true, you can feel the characteristic smell of burned rubber. The engine, of course, can be rewound, but only an experienced electrician can correctly perform this operation.
Rewinding of an electric motor is best ordered from specialists at specialized industrial enterprises. In most cases, it is easier to replace the engine with a new one than to rewind it.
Recommendations for installation and operation
To reduce the number of problems in the operation of the pumping station, it is important to correctly install the equipment, as well as follow the recommendations for operation and maintenance of the device. It is necessary to adjust the pumping station in accordance with the technical characteristics of the source and the required water pressure.
Pressure standards in the water supply system of a private house and ways to achieve the necessary pressure parameters are given in our article. We recommend that you familiarize yourself with useful material.
Image Gallery
Photo from
rules for competent operation of the pumping station
Control of air pressure in a hydraulic tank
Violations of the conditions of normal operation of equipment
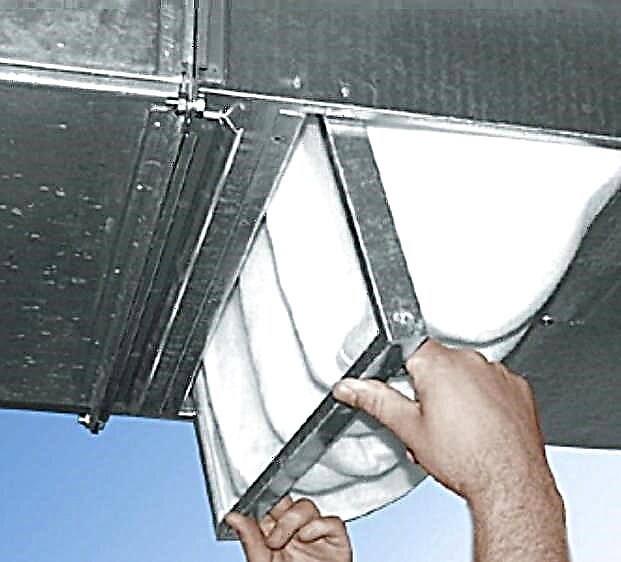
Prevent air from entering the suction pipe
Here are a few important points:
- To prevent vacuum compression of the water supply line, it is recommended to use either metal pipes, or rather rigid PVC pipes, or a hose reinforced for vacuum.
- All hoses and pipes should be mounted evenly, avoiding deformation and twisting.
- All connections must be sealed and sealed, as well as regularly checking their condition during routine inspections.
- Do not neglect the installation of a check valve on the water supply hose.
- The pump must be protected from contamination with a filter.
- The immersion depth of the hose leading to the pump must exactly comply with the recommendations of specialists.
- The pump station should be installed on a level and solid foundation, using rubber gaskets to dampen the effects of vibration during pump operation.
- To prevent the pump from running without water, a special circuit breaker must be installed.
- In the room where the pumping station is installed, the correct temperature (5-40 degrees) and humidity (not more than 80%) should be maintained.
It is recommended to check the status of the pumping station at least every three months. Separately, check the readings and settings of the pressure switch.
Another important preventive step is the bleeding of air, which is released from the water and fills part of the liner volume in the hydraulic tank. On large tanks there is a separate faucet for this. To remove unnecessary air from the membrane of a small tank, you will have to fill it several times in a row and completely drain the water.
Interesting practical experience in the repair of the Pedrollo pump station:
This video clearly demonstrates the disassembly of the station pump and the process of replacing the stuffing box:
However, before performing this procedure, experienced craftsmen recommend inspecting the shaft located beneath it. If the metal is excessively worn, the new oil seal will quickly deteriorate. You need to either restore the shaft (if possible), or completely replace the engine.
As you can see, a number of problems with the pumping station can be eliminated independently. In the event of complex breakdowns, you will have to consult a specialist. With proper care, the number of breakdowns can be significantly reduced.
If during the review of the stated material you have questions or have a desire to share your own experience in restoring the pumping station, please post comments.