Ease of installation and aesthetics have shifted consumer choice towards an easy-to-use electric heated towel rail. But its self-installation does not boil down to simply fixing the equipment with 4-8 screws.
Therefore, we will figure out how to properly connect the electric heated towel rail (EPS) in the bathroom.
What is the value of modern heated towel rails?
Towel dryers have become a great boon for residents of high-rise buildings for many reasons.
The electrical basis of this equipment avoids the complexity of installation and repair. Water heated towel rails require a separate riser in the niche of the bathroom, which in old houses has long been rusted and almost rotted in cemented floors.
Residents save time by applying to the Housing Office to stop the flow of coolant when repairing a leaked water device.
Image Gallery
Photo from
Electric heated towel rail in the lobby of the apartment
The device for fast heating of the room
The presence of a device for adjusting the temperature
Easy installation of electrical equipment
The aesthetics and hygiene of EPS are obvious. There are hundreds of models of this equipment that will allow you to choose the necessary size, desired appearance and convenient functionality - read more about the features of the selection below.
No need to paint the pipes, clean the seams and be careful not to spoil the fabric. In addition, an impractical piping, which often extends through two walls, is excluded from the wiring diagram.
The ability to use adjusting devices lifted the functionality of electrical appliances to heaven. You can choose the EPS with a timer, with temperature control, with backlight, with shelves. Although, to save money, you can also plug a simple heated towel rail into an outlet with an already built-in timer.
Mounting heated towel rails on rotary axes to rotate the frame in the right direction is also a useful development of the engineering idea.
Electrical equipment allows for controlled heating of the bathrooms. In apartment buildings with individual heating, the bathroom is often a dead end in the heating distribution: pipes are allowed into the bathroom through the kitchen, which is loaded with communications.
The use of an autonomous heated towel rail helps in the bathroom to remove unnecessary heating communications, in the kitchen to simplify the situation and increase ergonomics, improves the appearance of the room and significantly simplifies cleaning.

The regulator allows you to set the temperature required for various tissues, and also makes it possible to save money on electricity while reducing parameters
Electric heated towel rails with dignity do their main job - drying towels and clothes. Chrome pipes will never harm or leave marks even on delicate fabrics.
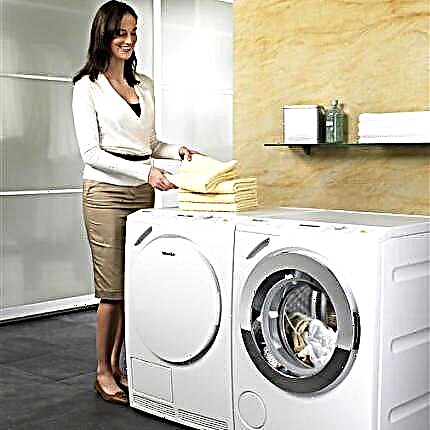
You can further list the advantages of an electric heated towel rail, but it is better to install it in your own bathroom and feel all the benefits yourself. The psychological effect of installing EPS is comparable to installing a modern washing machine after many years of hand washing!

Exquisite design models of heated towel rails are not only necessary equipment, but also an elegant decorative element of a bathroom or a combined bathroom
Operation without installation - reality
If you do not take into account additional options, then towel warmers in appearance are simply metal tubes welded into the frame with an electric cable coming out of them, so people often choose EPS, focusing only on its design look.
Manufacturing companies take into account this marketing nuance and try to offer consumers original engineering ideas.
The result of one of these ideas was a floor heated towel rail. It does not require installation at all, to turn it on, just plug the device cord into a power outlet. This option is suitable for bathrooms with a large area and a permanent dry floor area, where the device can fit without interference.

It is advisable to conduct a hidden connection of EPS with the participation of specialists who will lay the tiles so that they suggest the correct location of the fasteners
Mounted electric heated towel rails also have mounting features. Some models are equipped with an electric cable, which is built into one of the wall mounts. It is advisable to install such heated towel rails before laying the tiles in the bathroom.
Installing the appliance in the bathroom
There are three mounting options for electric heated towel rails:
- Installation of floor EPS.
- Installation of equipment before laying wall tiles.
- Connect a heated towel rail to the laid tile.
Before instrumental installation work, you must first determine the installation site of the EPS in accordance with simple rules.
Device Location Rules
In Khrushchev, you do not have to choose a place for a heated towel rail because of the geometrical restrictions of space. But in private houses and modern apartments with large bathrooms, it is advisable to take into account the following rules when installing EPS. The main criterion when choosing a place is its moisture resistance.

It is advisable to adhere to the recommendations and place an electric heated towel rail in zone No. 3, as shown in the figure. EPS located in zone No. 2, it is recommended to provide splash protection
The described rules are not a whim of some author, but are created for the safety of people during the operation of heating electric equipment.
Connecting EPS to the network
If the bathroom already has all the interior decoration, and you are not going to change anything, then in this case it is advisable to place heated towel rails closer to the power source.

Using carry cases for the constantly switched on electric heated towel rail is dangerous: a fire may occur. One should especially be wary of cheap models without a fuse.
Replacing the power cable with a longer version or lengthening it by creating a wiper will result in loss of warranty service for the device.
Therefore, you can offer a few options for connecting an electric heated towel rail when the outlet is remote:
- Buy a floor heated towel rail, which can be put closer to the outlet if necessary.
- Install an additional moisture-proof outlet near the EPS by pulling the cable in the box from the existing power point. This option is the least aesthetic and unsafe option.
- If there are removable ceiling panels, you can stretch the cable from the ceiling lighting by installing an additional outlet under the ceiling above the heated towel rail.
- Extend the power cable by voiding the free warranty service.
- Carefully pierce the wall from the existing electrified point and install an additional moisture-proof outlet recessed into the wall.
Although the power consumption of EPS rarely exceeds half a kilowatt, the socket for its connection must have a sufficient supply of power and be waterproof. In case of careless handling of the shower head, water can get on the electrical contacts and there will be a short circuit with fire.
Therefore, use only waterproof, certified electrical equipment in the bathroom.

Certified waterproof equipment costs more, but protects your family from accidents. modern models fit seamlessly into bathroom design
The introduction of the latest technologies in the field of material physics makes the use of devices absolutely safe even at a voltage of 220 V. New dielectric materials and innovative engineering methods of insulation guarantee the absence of direct currents in the housing while maintaining its high thermal conductivity.
But do not neglect the installation of protective equipment, because its operation is designed specifically for cases of breakdown of electrical appliances and violation of their insulation.
Installation of wiring in the bathroom
If the installation of a heated towel rail coincides or precedes the laying of tiles in the bathroom, then you should pay attention to the rules for laying cables and installing electrical outlets in wet rooms.
Consider the installation recommendations for installing electrical wiring in the bathroom:
- the power line must be grounded;
- all elements of the wiring must be waterproof;
- Separate automation (RCD) must be installed on sockets and fixtures, which will turn off the power in case of current leaks;
- it is advisable to choose copper wires with a non-combustible winding;
- be sure to use a three-core cable to ground all electrical appliances.
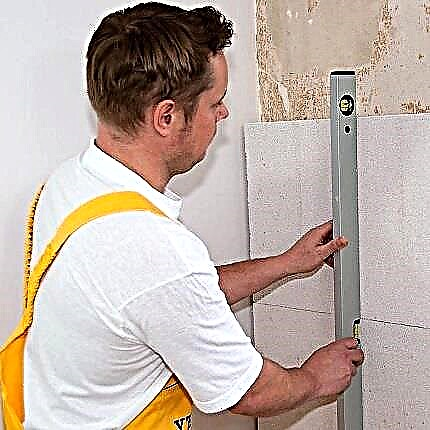
To lay the cable to the planned outlet, you first need to make the grinder a strob (groove) for the wire.

To form a convenient wide groove, a special double abrasive disk is used: with its help, you can make a straight straight strobe
Then a drill with a special nozzle in the wall makes a recess for the outlet.

To make drilled holes at the same level, you can use special wooden stencils, the diameter of the holes in which coincides with the diameter of the sockets
Then, a cable is laid in the strobe, which is pressed with special clamps or simply fixed every 15-20 cm with cement mortar. After this, the socket is placed and the moisture-proof socket itself is mounted. A more detailed briefing on installing outlets in the bathroom can be found in this material.
When installing an electric heated towel rail with a hidden entrance, installation of an outlet is not required. It is enough to leave the “tail” of the electric wire measuring 10-15 cm in the right place.
If you have already bought an electric heated towel rail and you have a power outlet in a convenient place, then it's time to move on to the step of attaching the equipment to the wall.
How to drill holes in a tile?
After completing all measurements and marking with a marker the points for screwing in the fixing ESF screws, it is necessary to drill holes for installing dowels.
We will reveal some secrets of the correct and safe drilling of tiles:
- it is not recommended to drill holes near the edges of the tile and in the tile spaces;
- to avoid overheating of the drill, you can periodically dip it in a glass of clean water;
- if drilling is carried out with a punch drill, then at first the tile is drilled in the shockless mode, and then drilled in the punch mode;
Note that when drilling tiles at low speeds, the use of a drill for metal is allowed.
The procedure for drilling a hole in a tile is as follows:
- Marker points on the tile.
- Gently enamel enamel at the intended point using a drill at low speeds or the tip of a file.
- If the enamel cannot be beaten, then a piece of adhesive tape can be glued to the drilling site so that the drill does not slip.
- Drill a tile in shockless mode.
- Drill the wall in punch mode with maximum pressure.
After the formation of all holes, plastic dowels are pushed into or hammered into them with a soft mallet.

Using masking tape facilitates fixation of the drill. Do not stick a medical plaster on the tile - this will only complicate the drilling process
For each type of wall, appropriate fasteners are used to more securely fix the heated towel rails.

Plastic dowels on thin walls may not hold the towel rail, so use special fasteners in this case
It is possible to use all the options shown in the figure.
Direct installation of a heated towel rail on the wall
It is better to carry out the installation of an electric heated towel rail on a wall with an assistant. You can do this yourself, but it is better for one person to hold the device, and the second screw it to the wall with screws.
Between the vertical wall and the legs of the EPS do not forget to put the rubber or plastic seals that come with the heated towel rail.

Under the bases of the drying holders, put gaskets. Sealing pads prevent moisture from entering the chambers and prevent shrapnel damage to the tiles that often occur during installation
Hanging a heated towel rail is necessary only after disconnecting it from the mains. After installing the EPS on the wall, you can proceed to the most critical stage - the inclusion of equipment in the network.
Commissioning Rules
Before plugging the heated towel rail into a power outlet, be sure to read the operating instructions that came with the equipment.
Even if the EPS does not have adjusting components, you still need to familiarize yourself with the following equipment characteristics:
- maximum power consumption;
- minimum and maximum heating temperature;
- maximum time spent on;
- restrictions on the types of fabrics that can be dried.
Do not forget about the danger of burns in children in contact with parts of an electric heated towel rail. It is advisable to talk about the new device with small family members, and it is better to stage the usual actions of children in the bathroom with the EPS turned off.
This will allow you to see potential hazards and prevent injuries.

After turning on the EPS in the network, you can check - hang the first wet towel on it to feel the working effect
Do not start operation of electric heated towel rails:
- before the end of the installation on the wall;
- disassembled;
- in rooms with damaged wiring;
- when connected to an ungrounded outlet.
Before starting up for the first time, wipe the towel rail body with a damp cloth, remove building dust, grease stains, and wait for the surface to dry. If the instructions are read and all safety requirements are met, then you can safely include an electric heated towel rail in the network.
Using an electric heated towel rail
EPS can be installed not only in the bathroom or in the combined bathroom. Installation of this equipment is possible anywhere in the apartment or house. Floor portable heated towel rails are especially convenient in this regard. To dry things faster, the device can also be connected to the mains on the balcony or on the street.

If you are going to dry EPS on an open loggia or balcony, watch the weather so that the appliance does not get in the rain
Recommendations for the use of electric heated towel rail:
- try to use only cross bars for drying things;
- Do not place paper or plastic products on the EPS housing;
- Do not clean the heated towel rail when it is on;
- Do not lean on the crossbeams.
Compliance with these rules will extend the life of the electric heated towel rail and protect it from damage. But if the equipment is still out of order, do not rush to call the master - you can deal with the breakdown yourself. And how to do this can be read here.
Quick photo guide for home installers
A selection of photos will clearly demonstrate the stages of installation and connection of electric drying:
Image Gallery
Photo from
We select a suitable model for an electric heated towel rail that meets our needs for heat transfer, shape, design
We are studying the method of connecting electrical equipment. In our case, the power supply should be connected to the lower right holder, to which the control device is also confined
We examine the complete set of the electrical appliance, compare the presence of elements with a list from the manufacturer. If everything is fine, pay for the purchase
We are preparing the wires of the electric heated towel rail for the upcoming connection. In our case, the drying is connected directly to the lighting line, it will be turned on using the button
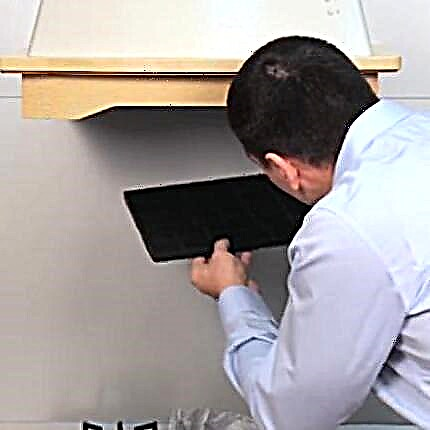
We attach a heated towel rail to the installation site. We mark through the holes in the base of the holder the points through which we will fix the device on the wall
We select a tool for drilling holes in the wall, depending on the material from which it is folded, and on the finish. The diameter of the drill must match the size of the dowel
We carefully hammer the dowels into the drilled holes. If we act with a hammer, it is advisable to hammer through a wooden block, so as not to damage the tile
Next, prepare the wires for connection. If the wiring is too long, cut it so that approximately 7 cm remains. Remove 7 mm of insulation from the phase and neutral wires, connect
Stage 1: Choosing an electric heated towel rail
Stage 2: Study of the design and connection method
Stage 3: Examination of the heated towel rail
Stage 4: Preparing the electrical equipment for installation
Stage 5: Marking points for mounting hardware
Stage 6: Drilling holes for the dowel fasteners
Step 7: Install the dowels in the drilled holes
Step 8: Connect the heated towel rail to the wiring
The connection is complete, now it remains to fix the electric dryer on the wall, for this:
Image Gallery
Photo from
Step 9: Install the plastic casing on the joint
Step 10: Fixing the Drying Holders to the Wall
Step 11: Verify the installation is correct and reliable
Step 12: Check the electrical connection
There is nothing particularly complicated in installing and connecting an electric dryer. You can cope with the installation yourself, without calling an electrician. However, an assistant will still be required to hold the device.
Important information on installation and design of EPS
Installation of an electric heated towel rail does not require a specialized tool: a grinder, a welding machine, a soldering iron. To install it, a screwdriver and a drill are enough, which, in extreme cases, can be asked from a neighbor.
Therefore, the fastening of EPS on a repaired wall can be carried out by any person who has the initial skills of working with a drill.
Electric heated towel rails do not require special communications if there is a power outlet mounted by the rules nearby. Wall designs in some models allow you to rotate the EPS frame to save space in the bathroom.
The maximum working surface temperature for most heated towel rails is limited to 70 ° C, which is enough to heat a small room in the cold season.

A temperature of 60-70 ° C during short-term contact does not cause burns, but try not to encircle the hot rails with a full palm
EPS models with oil in the form of a coolant are demanding of the level of inclination of the transverse slats. Therefore, it is recommended that this type of EPS be installed at a horizontal level and strictly adhere to the lower location of the heater, according to the instructions.
ESD hidden connection:
Mounting on a tiled plasterboard wall:
Step-by-step instruction in pictures:
Compliance with the above installation instructions will help any homeowner to install an electric heated towel rail independently. Tips will help to avoid cracks in ceramic tiles, keep drills working and protect your family from accidents and injuries.
Perhaps you already had to deal with the installation of a heated towel rail and you can give valuable advice to our readers? Please share your experience, ask questions in the box below. You can supplement your comments with photos.